

| | Home | Board | Calendar | Education Tidbits | | Members | Newletters | Programs | Philanthropy | Slide Shows | Sign In | |
April 2024
MY NEW WAY TO PICK A PROJECT “TO DO” NEXT
“April showers bring the flowers that bloom in May”... It sounds so lovely and it is great to see all those blooms, and then, you sneeze. I do love the spring, because I love all the little animals and birds, and the sunshine, but I admit I could really do without the sneezing. I am getting ready to do a thorough spring clean of my manor. The great thing about living in a small home, you can spring clean in a couple of hours, and then get back to sewing, yay!
My January and February tidbits spoke about enjoying the creative process and organization, and moving from “To-Do” to “Ta-Done”. I explained how I take my projects, put all the fabrics together, organize them into project bags, and then pull out a project on a whim and sew it up. Well, in March the Village told us that they would begin prepping our building for painting the exterior. I was elated to see that happening, as it had been put off for 4 years due to the pandemic and other issues. I was happy until it started. With all the hammering, pounding, and sawing, loud noises echoed through our manor. I had a tough time concentrating on my sewing and some days I got a “pounding” headache. I did not get much sewing done at home in March.
Rather than waste time moping because I could not concentrate enough to sew, I decided to do an inventory of my projects, document each project’s status, and location. I created an excel spreadsheet, with all this information. As I documented status, I cut out sashing, and borders, and found patterns for those collections of fabric without any design plan. Finally using the numbers assigned to each project from the spreadsheet, I decided to follow my friend’s idea and created the Project Jar, pictured below:
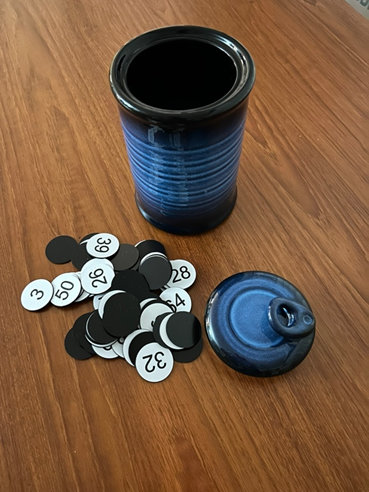
So far I have pulled one number from the Project Jar, Number 31, and began making a “Happy Trails” quilt on Mondays at the CH4 Quilting Studio. It is a traditional snail’s trail or monkey wrench quilt utilizing charm squares. The pattern has you create 2 blocks from a set of dark and light charm squares. Below is an example of entries in the spreadsheet:
| No. | Locale | Title | Status |
| 31 | Rolling Cart | Happy Trails MSQC pattern | 3/25/24 Sewing at CH4 – 6 blocks completed, 4 cut out & ready to sew |
The building’s paint prep work must be completed because the swarm of “minions” sent to work on the outside of the building have moved up the street. I began referring to them as minions, because the workers wear blue work clothes, yellow vests, and yellow hard hats and reminded me of the minion characters in the Disney movies. My home is blessedly quiet once more. I can finally finish the quilt top that has been hanging on my design wall. I will now return my efforts to sew on the 2-pieced mitered borders to complete the quilt top, and then I get to pick out another number from the Project Jar!
Happy Quilting! Have a great April. I am so pleased to announce that I will be teaching “Learn to Make a Quilt – A Beginning Quilt Class” for 8 weeks starting April 27th through June 15th. I will attempt to write a May tidbit, but I “may” or “may not”, ha ha. Blessings to you and your family.

Please e-mail the Webmaster for any problems with the website or any questions: webmaster@crazyquiltersguild.org
|
April 2024
MY NEW WAY TO PICK A PROJECT “TO DO” NEXT
“April showers bring the flowers that bloom in May”... It sounds so lovely and it is great to see all those blooms, and then, you sneeze. I do love the spring, because I love all the little animals and birds, and the sunshine, but I admit I could really do without the sneezing. I am getting ready to do a thorough spring clean of my manor. The great thing about living in a small home, you can spring clean in a couple of hours, and then get back to sewing, yay!
My January and February tidbits spoke about enjoying the creative process and organization, and moving from “To-Do” to “Ta-Done”. I explained how I take my projects, put all the fabrics together, organize them into project bags, and then pull out a project on a whim and sew it up. Well, in March the Village told us that they would begin prepping our building for painting the exterior. I was elated to see that happening, as it had been put off for 4 years due to the pandemic and other issues. I was happy until it started. With all the hammering, pounding, and sawing, loud noises echoed through our manor. I had a tough time concentrating on my sewing and some days I got a “pounding” headache. I did not get much sewing done at home in March.
Rather than waste time moping because I could not concentrate enough to sew, I decided to do an inventory of my projects, document each project’s status, and location. I created an excel spreadsheet, with all this information. As I documented status, I cut out sashing, and borders, and found patterns for those collections of fabric without any design plan. Finally using the numbers assigned to each project from the spreadsheet, I decided to follow my friend’s idea and created the Project Jar, pictured below:
So far I have pulled one number from the Project Jar, Number 31, and began making a “Happy Trails” quilt on Mondays at the CH4 Quilting Studio. It is a traditional snail’s trail or monkey wrench quilt utilizing charm squares. The pattern has you create 2 blocks from a set of dark and light charm squares. Below is an example of entries in the spreadsheet:
| No. | Locale | Title | Status |
| 31 | Rolling Cart | Happy Trails MSQC pattern | 3/25/24 Sewing at CH4 – 6 blocks completed, 4 cut out & ready to sew |
The building’s paint prep work must be completed because the swarm of “minions” sent to work on the outside of the building have moved up the street. I began referring to them as minions, because the workers wear blue work clothes, yellow vests, and yellow hard hats and reminded me of the minion characters in the Disney movies. My home is blessedly quiet once more. I can finally finish the quilt top that has been hanging on my design wall. I will now return my efforts to sew on the 2-pieced mitered borders to complete the quilt top, and then I get to pick out another number from the Project Jar!
Happy Quilting! Have a great April. I am so pleased to announce that I will be teaching “Learn to Make a Quilt – A Beginning Quilt Class” for 8 weeks starting April 27th through June 15th. I will attempt to write a May tidbit, but I “may” or “may not”, ha ha. Blessings to you and your family.